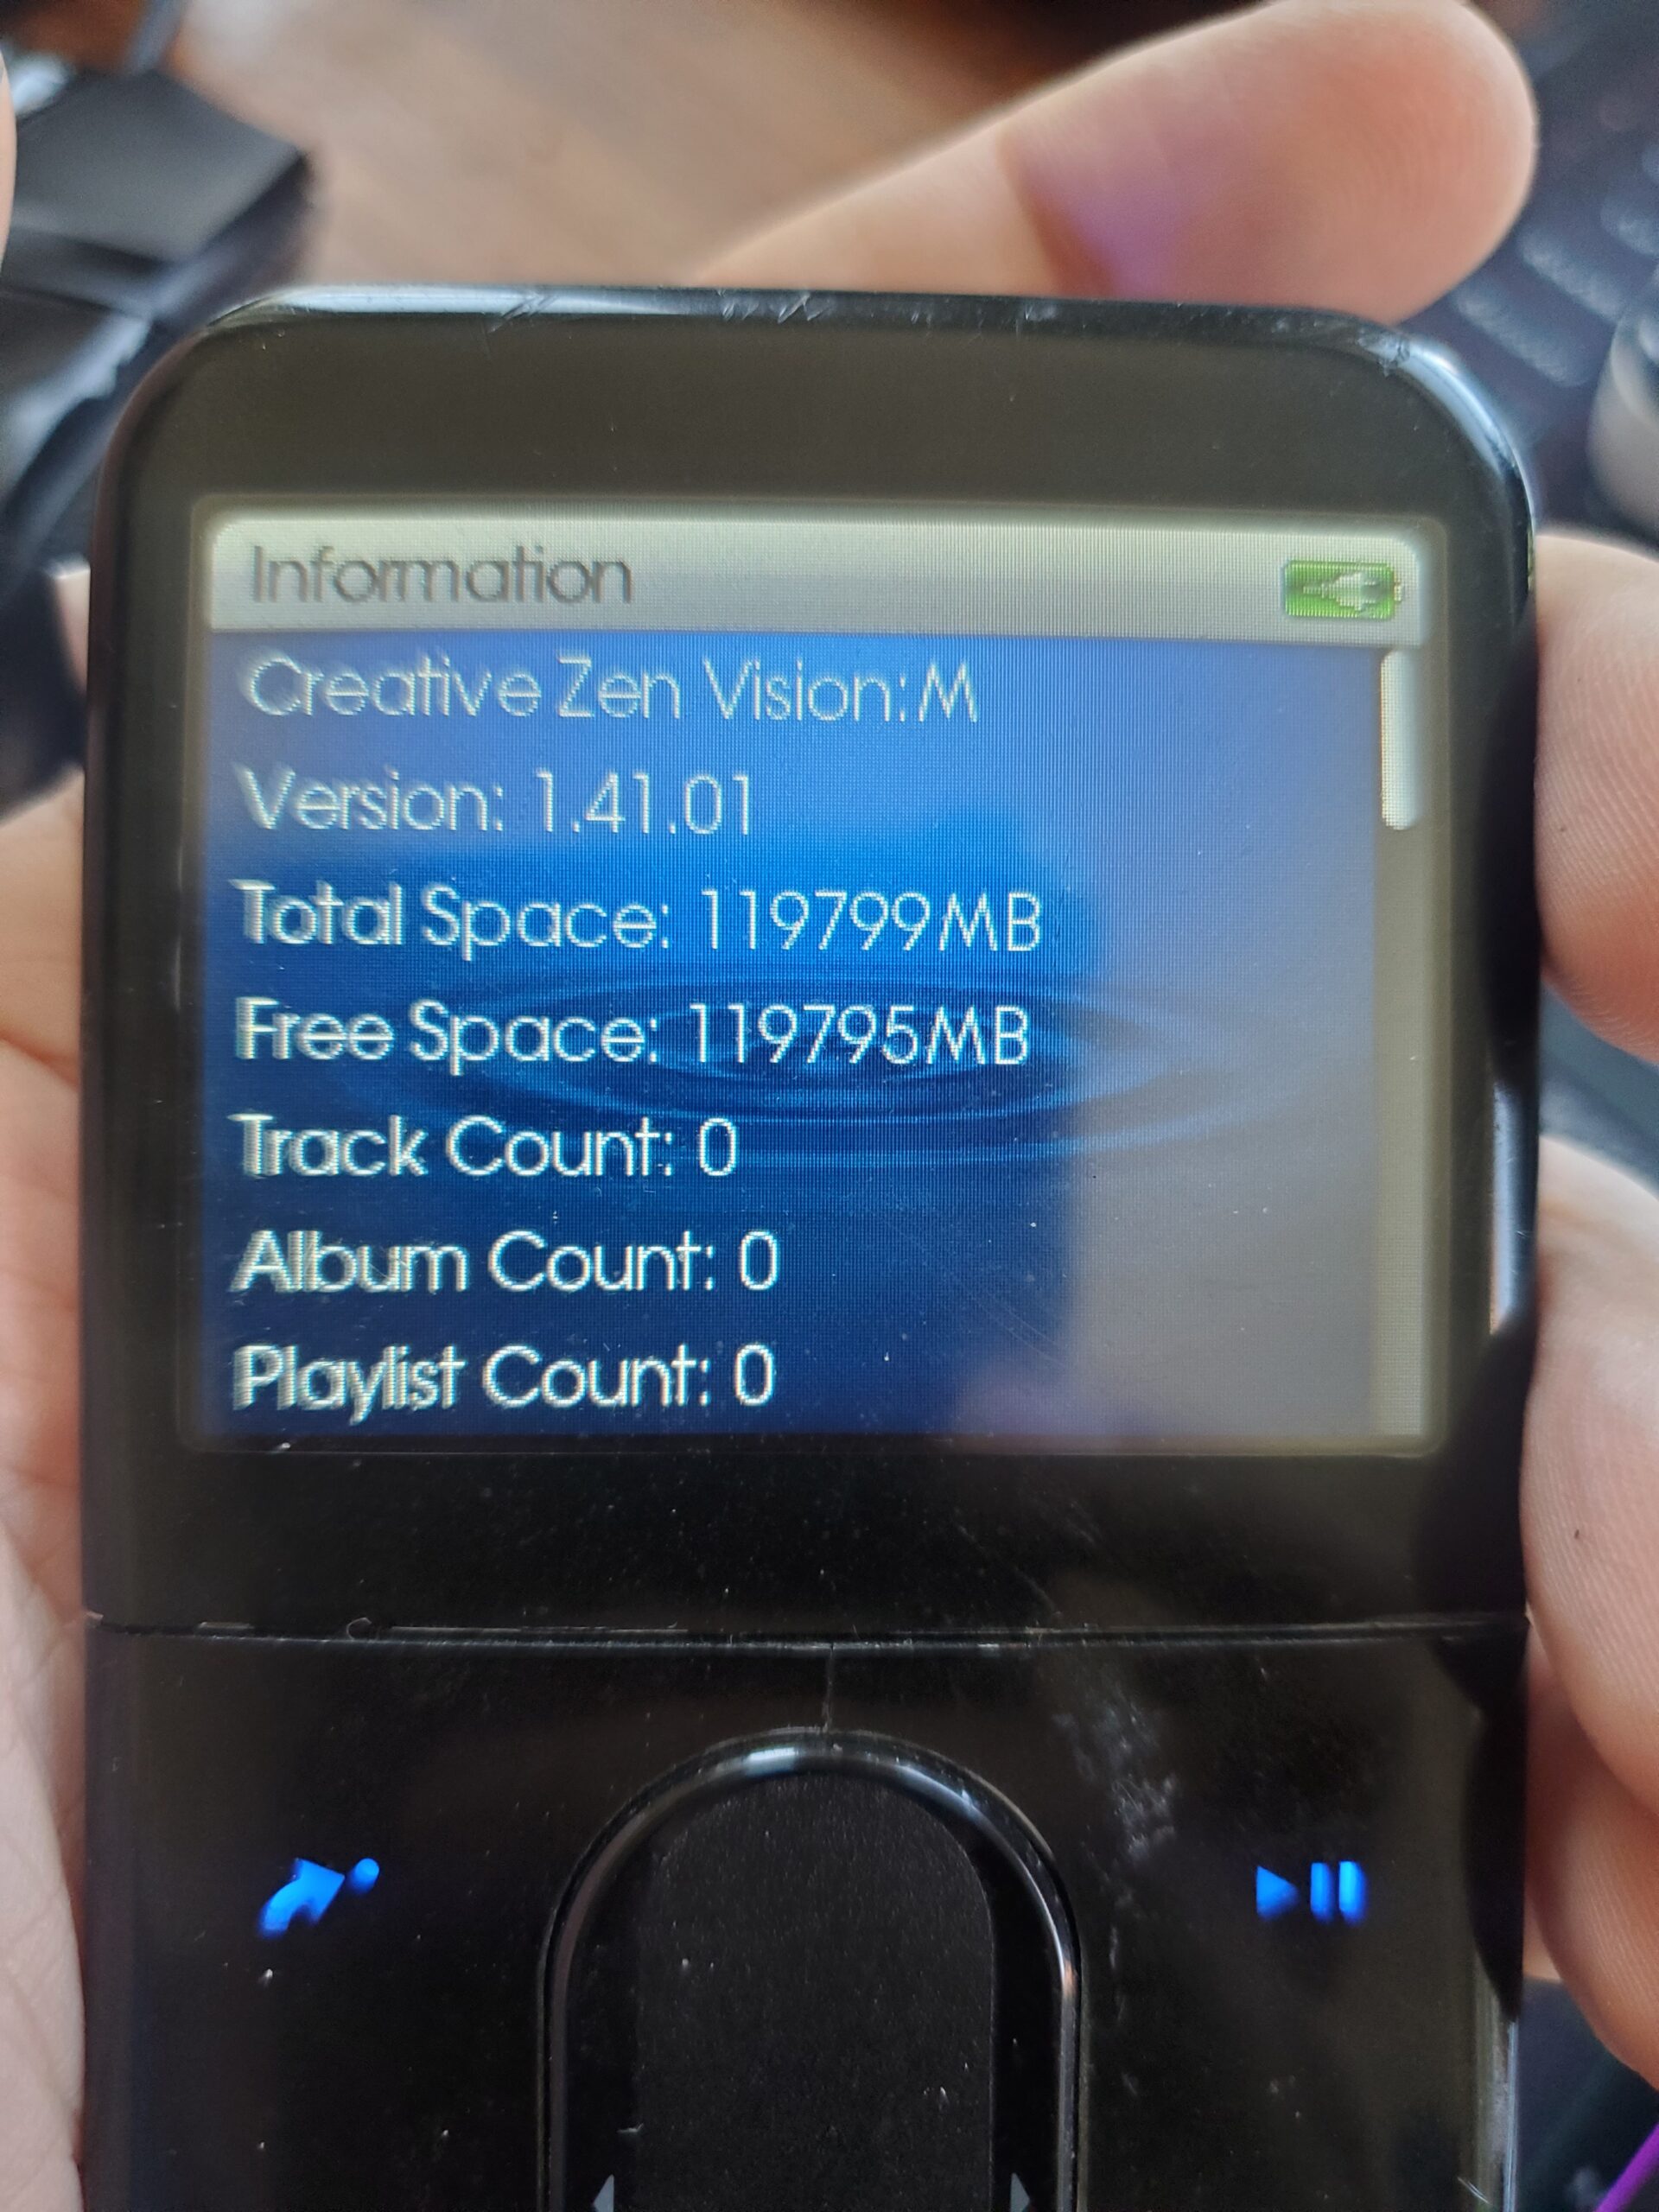
I previously showed how I upgraded a ZIF Creative Vision:M to use microSD. This time I have an IDE version, not ZIF. I couldn’t find any good info on upgrading the IDE version so I thought I’d document it here.
Parts needed:
- $8 NFHK CF Compact Flash Memory Card to 50pin 1.8 Inch IDE Hard Drive SSD Converter Adapter
- $13 QUMOX Dual Port CF Adapter Reader for microsdXC TF to Compact Flash CF Type 1 Memory Card
- $12 Amazon Basics 128GB microSD card I used Amazon Basics, but any good card should work.
- $16 Cameron Sino Rechargeble Battery for Creative Zen Vision M
So for about $50 you give your Creative Vision:M a new battery and upgraded microSD storage.
Opening it, and the firmware steps, are exactly the same as what I described in my previous post. So, I’m just going to focus here on the IDE vs ZIF differences. Here’s a YouTube video that shows how to take the Creative Zen Vision:M apart
OPENED
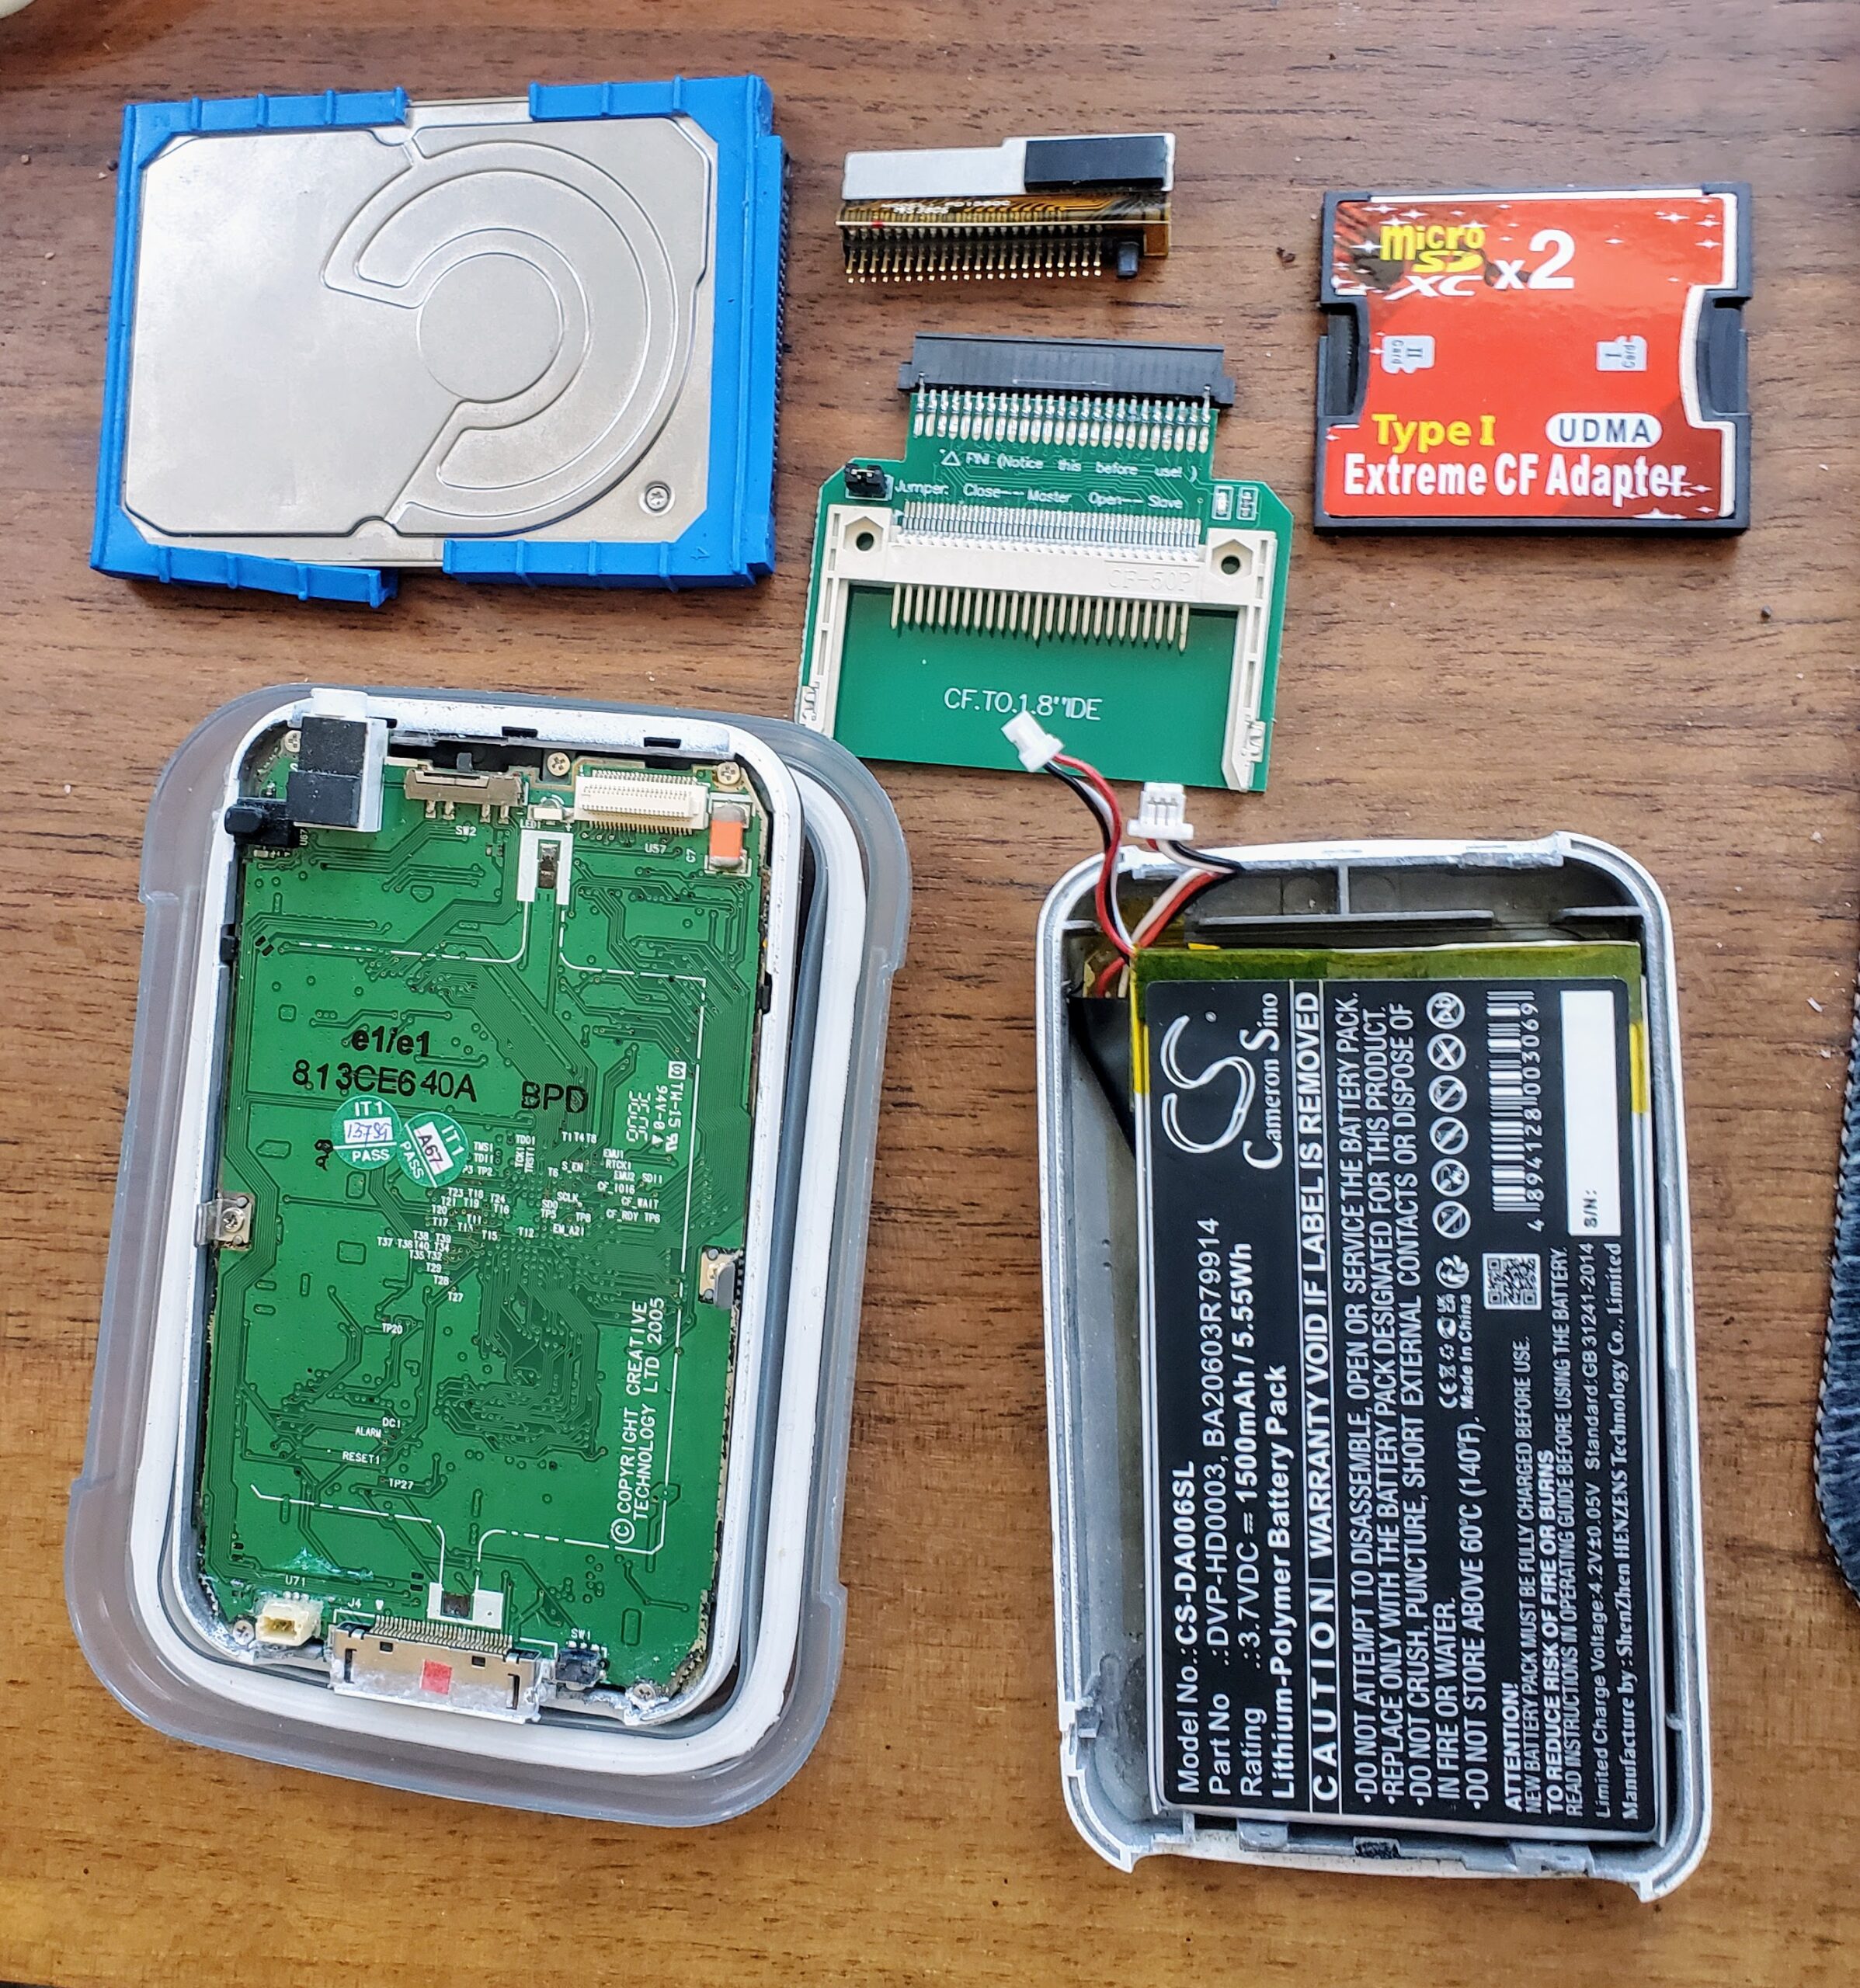
This is the Vision:M opened with all parts ready to go.
ORIGINAL HDD
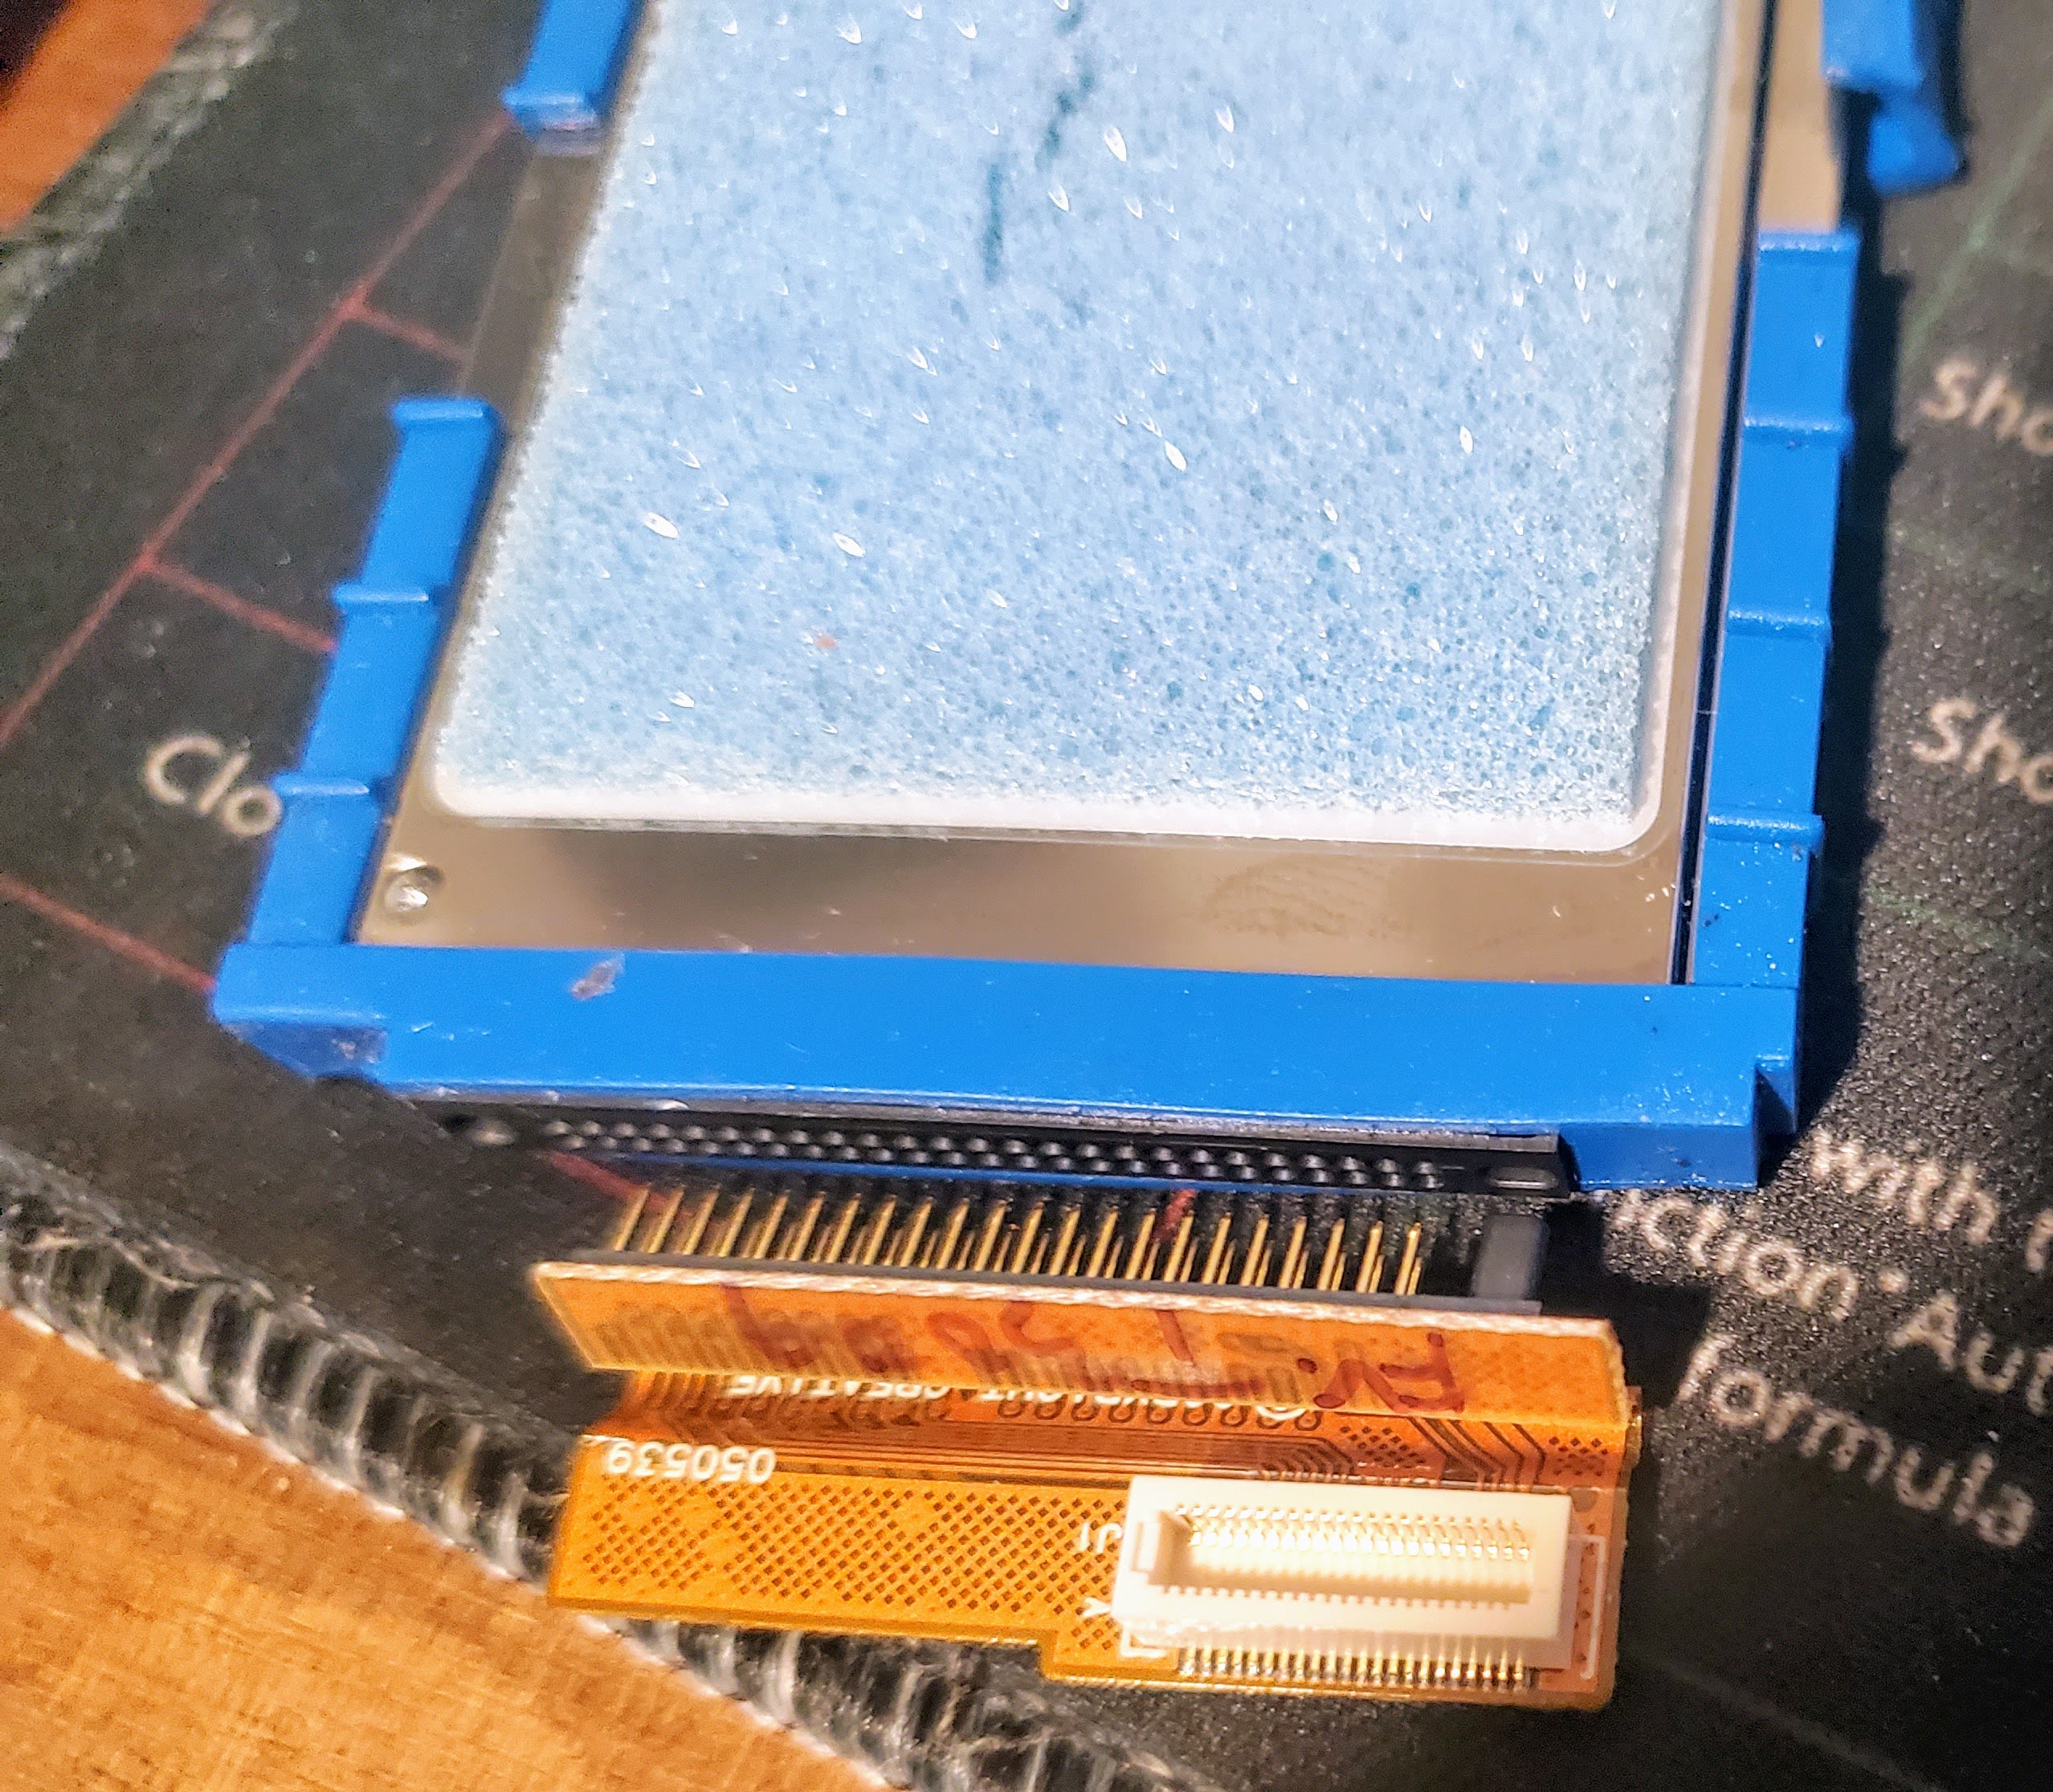
This is the original HDD, note that it is upside down in this picture and notice that the connector doesn’t connect to all of the holes. 4 or 6 (I forget which) are not connected.
NEW DRIVE
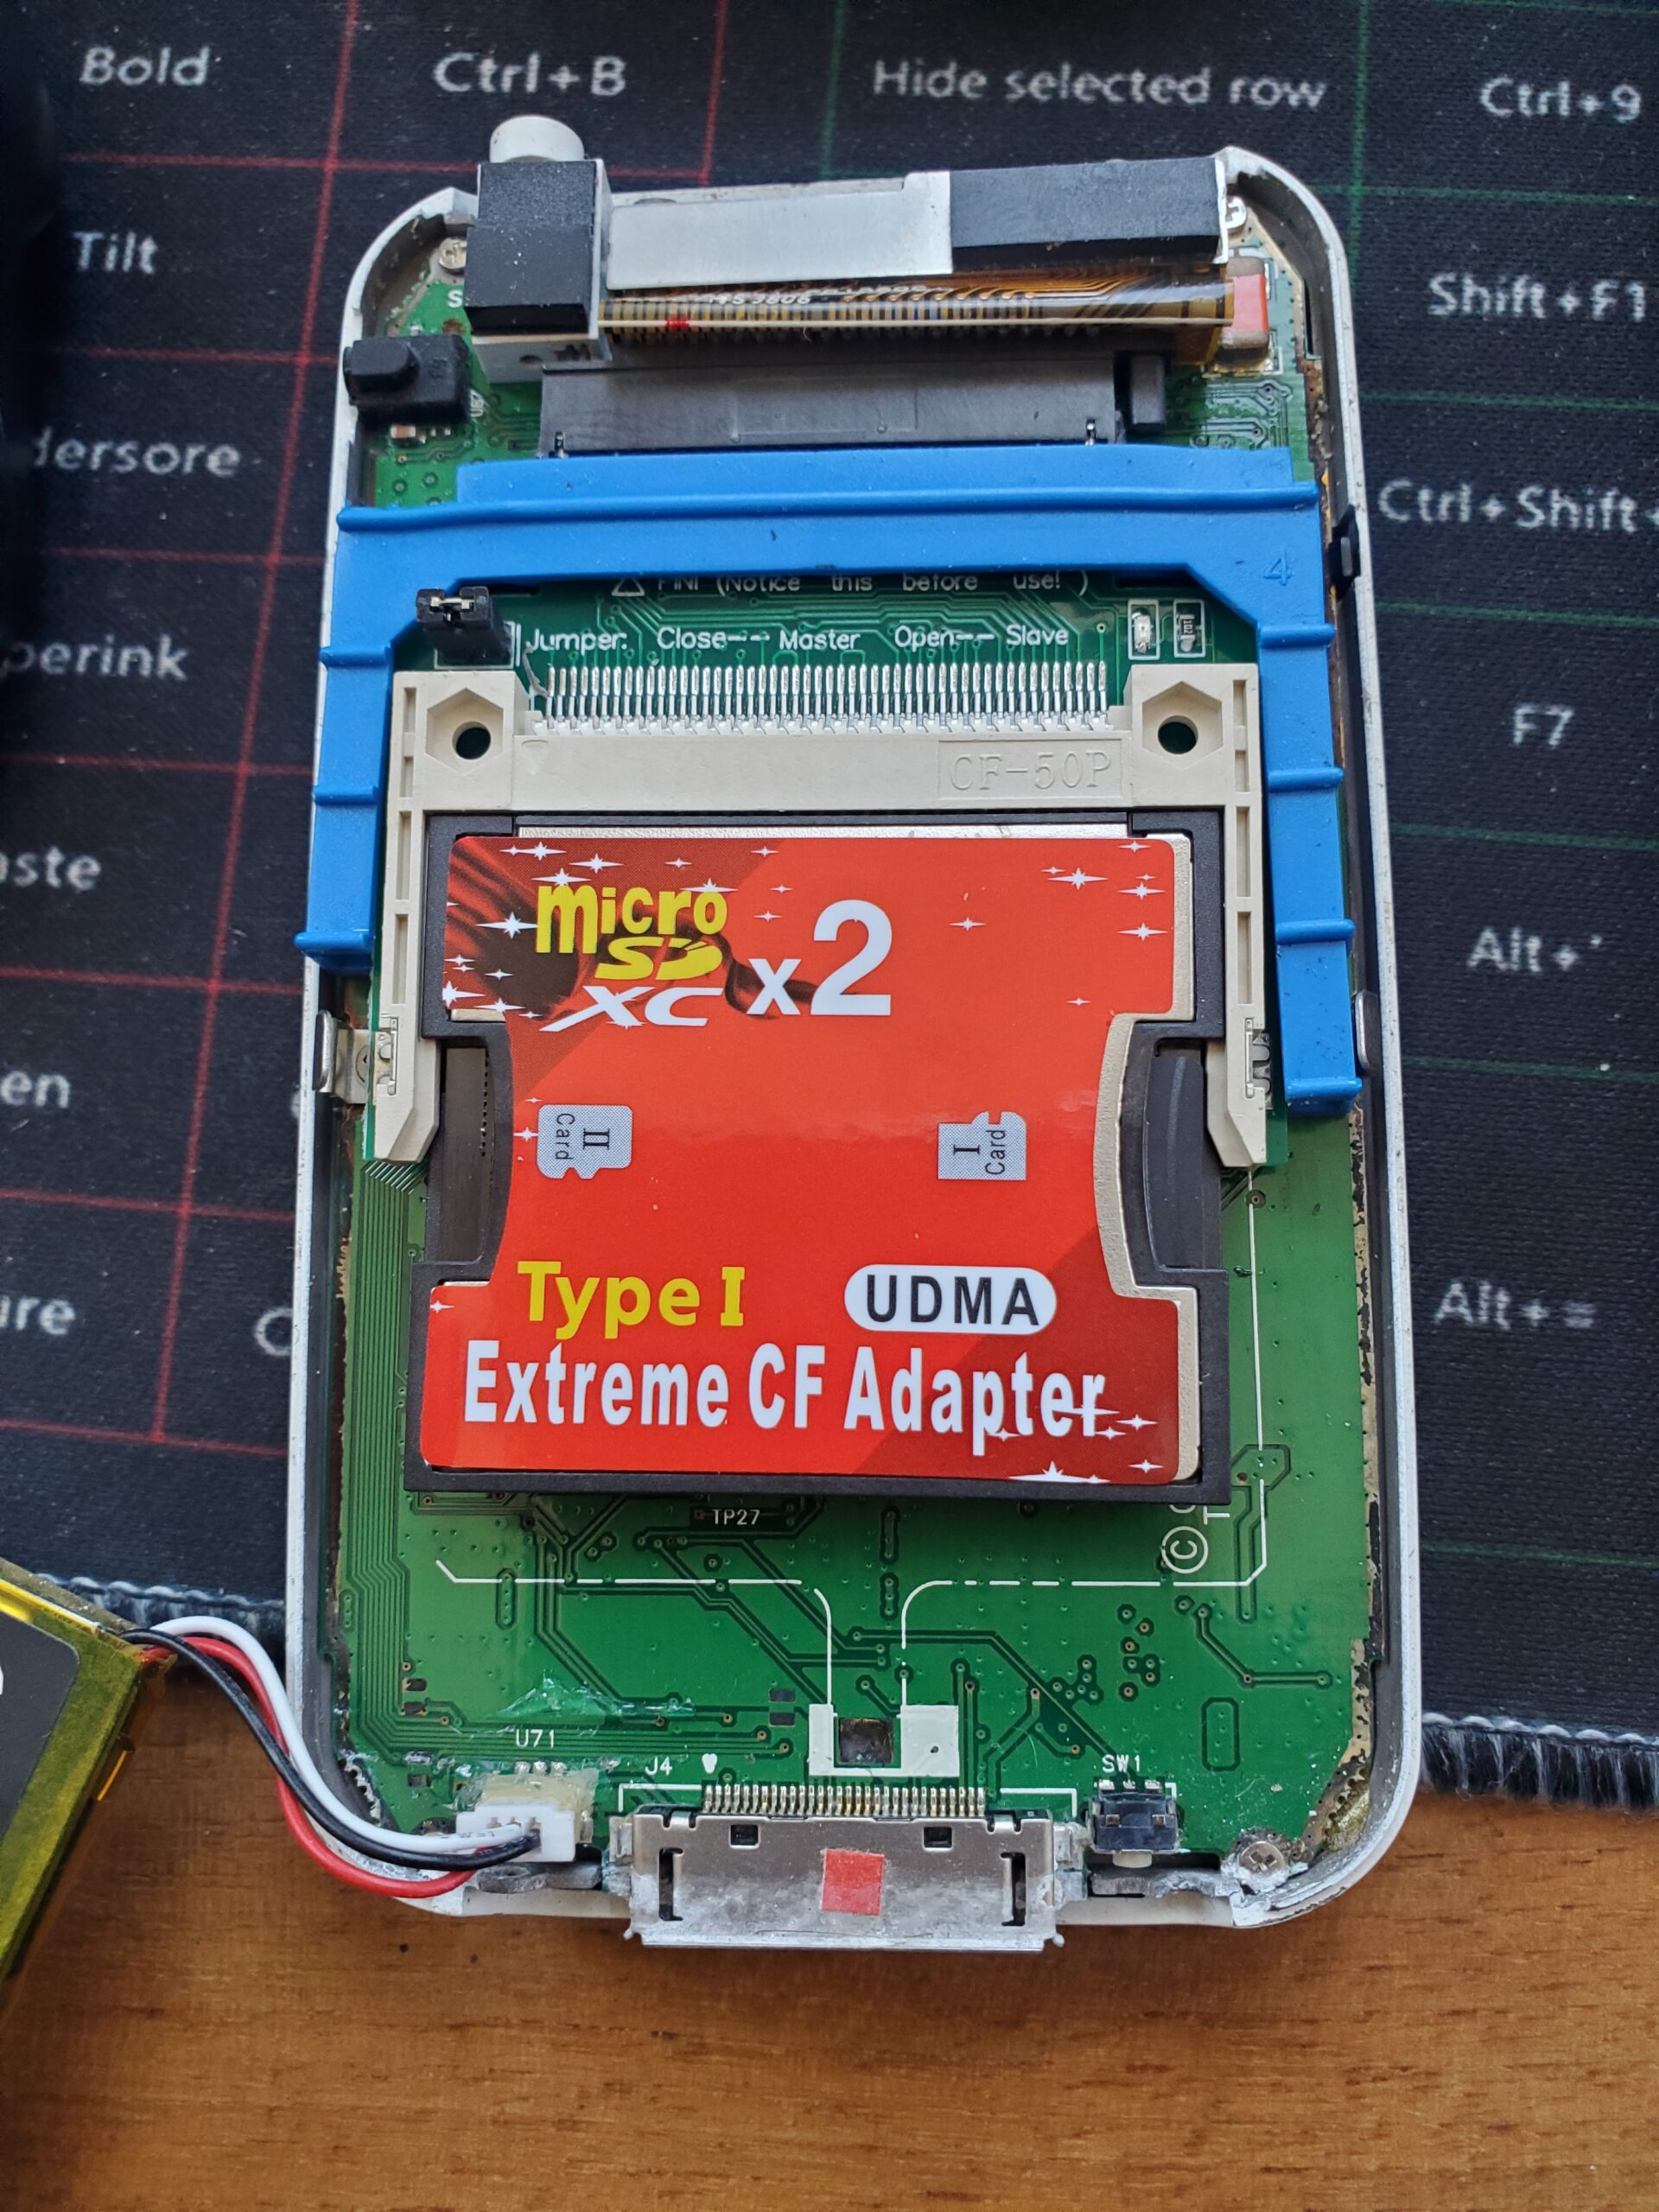
This is what the new drive looks like when it’s installed. Not seen in this picture is a piece of electrical tape I put on the adapter’s pin (upper left of the adapter).
DONE
All done – 128GB drive now!
NOTE: As an Amazon Associate, I may earn commissions from qualifying purchases from Amazon.com.
Why to use dual cf card adapter and not normal single?
It works and is cheap. Maybe a single would work, but I haven’t tried it.